Tinkering


I do a lot of fun, smaller projects as a hobby. This page shows some of those.

Portfolio Overview

Overview


I do a lot of small projects as a hobby. Doing these little projects has taught me a lot and this knowledge helps me distinguish myself from other Creative Technologists. It's also nice to do fun projects which are too silly to be a part of my study. Plus, I get to keep the stuff I make.

All these projects are listed together on one page; this page. You can choose to scroll through or use the provided quick-navigation on the right to go to a specific project. Note that I don't upload all my projects to this page. Only the ones that are significant, funny or otherwise important.


BierCount®


Tinkering Projects - BierCountR

The BierCount® was the first of many small hobby projects. I decided to start doing these as a hobby and a way of learning more and distinguishing myself from others in my study. This project may be simple, but it started off a huge stream of other projects. Plus, I still use it to this day.

The BierCount® is very simple. It's just a lasercut box with an 2x16 LCD display and 4 buttons. Its purpose is to keep track of my, and my neighbour's, beer inventory. Both me and my neighbour have 2 buttons. One button adds 24 beers on my name, the other subtracts one. So, if I drink one, I press the -1 button, and if I buy a new crate, I press the +24 button.

The display shows 4 numbers. A score for me, a score for my neighbour, the total amount of beers left and the total amount of beers drank. When there aren't any beers left, the person with the lowest score has to buy a new crate.


Useless Website Generator


Tinkering Projects - Useless Website Generator (Take me to a useless website please)

The Useless Website Generator is a small project I made on Nutshotters.nl when I was bored. It is inspired by the original Useless Website Generator. It takes you to a random link from a list of 100 useless websites composed by me.

Every website is different, but they're all practically useless. There are websites which just play a sound effect, have small games, or websites with an unique feature such as the Worlds most exclusive website, which only allows one visitor per hour.

Here's a small overview of a few of my favorite websites on the list:


Alcoholock


Do you remember those games where you had to move a ring over a steel wire without touching it? Well, I do. I actually made one into a lock, which I used to protect my liquor cabinet. Meaning that you have to complete the game in order to gain access to my liquor cabinet.

The idea behind this is of course that you cannot continue drinking if you already had too much, since drunk people will have trouble completing this challenge.

In the video you can see 2 screws around the wire. The goal is to touch screw #1 and then screw #2 without touching the wire in between. If you do touch the wire, you'll have to touch screw #1 again to restart. The red LED indicates that you've touched the wire and the green LED is lit if you managed to finish without touching the wire.

As a little bonus I made it look like a padlock. Because that seemed appropriate given its function.


P.S. I apologize for the poor video quality and proportions. This is an old project and it was filmed on a phone at the time, but it was still the best video available.


Jaws Doorbell


Tinkering Projects - Jaws Doorbell

I love movies, especially blockbusters. Like Jaws. Jaws is of course famous for its trademark theme song, which consists of only 2 notes, yet invokes a feeling like no other theme song can. The approach of the great white, which is coming closer and closer, translated to the tempo of the music increasing faster and faster.

But this same theme can be applied to any sort of approach really. I chose to make a doorbell, which would play the Jaws theme as somebody approached. The tempo was based on the measured distance to this person. When the person has reached the bell, and the music is at its highest tempo, it ends as a total anticlimax. Pressing the doorbell stops the Jaws theme and plays a very generic 'ding dong' sound, which I thought was funny.

Due to its limited storage capacity, Arduinos aren't very good with audio. Therefore, the Jaws Doorbell still had to be attached to a computer to work. The computer will then play the music. This isn't very practical, but since it was just a hobby project and not a real prototype, I figured I'd just let it be.

The Keyframe animation on the left shows the assembly of the Jaws Doorbell. It's nothing too complex. Just a distance sensor and Arduino in a lasercut box.


Schrikdraad


Tinkering Projects - Schrikdraad (Jump scare electric fence)

Schrikdraad (electric fencing in English) is electric wire which will shock you if you touch it. It's used on the fence behind my parents' house to keep the horses in. The Dutch word 'schrikdraad' consists of 'schrik' and 'draad'. 'Schrik' means scare or fright and 'draad' simply means wire.

So, I thought; "Why not take this literally?", and I made schrikdraad that actually scares you when you get too close. I collected about 10 audio samples of people screaming in jump scare videos from YouTube.

I used a motion sensor in a small box. The box was disguised as a pole cap in the fence. A small but wide hole was cut in the side. This allowed the motion sensor to 'see' in a line, about 1 meter from the fence and about 4 meters wide. If it detected motion, it'd send a signal to the computer, which would in turn send a signal to a hidden Bluetooth speaker on max volume, which would then play one of the audio samples.

I hid this in the living room of my student house as well. I caught some fun reaction videos, but unfortunately I cannot seem to find those anymore.


Rotating Parking Card


Tinkering Projects - Rotating Parking card

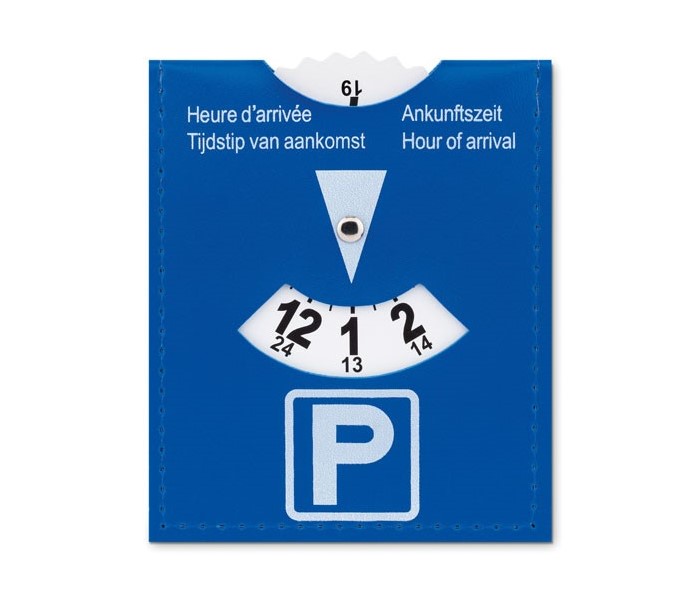
I assume anybody reading this will be familiar with the system, but just for clarity: If you want to park your car anywhere where you can only stand for a limited amount of time in the Netherlands, you have to put a specific card (see photo) that indicates your time of arrival on your dashboard. So, for example, if the card says you arrived at 3, you're only allowed to park there for an hour, and it is 5 o'clock right now, the cops know that you're overtime.

I made a parking card that is able to rotate itself, essentially changing the time of arrival. It works very simple: My car has a small gap in its dashboard in which I've put a mini RC Servo which can rotate 360°. On the back of the card is a small hole that fits over the Servo and prevents the card itself from rotating.

Attached to the servo is a small lasercut box with an LCD and a battery. If you activate it, it will fully reset the rotation of the servo and then ask you for 2 parameters: The interval time and the step size. For an interval time of 1 hour and a step size of 30 minutes, the card will move 30 minutes forwards every hour.

One important measure that I added was a (hidden) motion sensor. If this sensor detected motion during the last 30 seconds, it would postpone rotating the card for one minute and add this minute to the step size. This will hopefully prevent me from getting caught.

Disclaimer: I've never actually used this since it's illegal, of course.


BoozeBuddy


After having used the Alcoholock for a while, I decided that I needed to do something fancy with my liquor stash at my parent's place as well. Introducing: The BoozeBuddy.

The BoozeBuddy is nothing more than a fancy liquor cabinet. It can hold up to 6 bottles. It's designed to be safe, but also present the bottles in a unique, chic style. The BoozeBuddy is mostly transparent, made with plywood and acrylic plates. It is hexagonal of shape and the inner part rotates to move the correct bottle towards the door.

Usage is rather simple: Unlock the BoozeBuddy with the key. This will enable the 2x16 LCD display. Using a rotating and a push button you can scroll through the options. The options are "predefined bottle name 1 – 6" and "Surprise me". The latter gives you a random bottle and repeatedly changes the colors of the LEDs inside.

After selecting your bottle, the inner part will rotate said bottle towards the automatic door. The door will open automatically, and the LEDs turn green. After you've taken out the bottle, you give the button another push, and the LEDs turn red and the door closes. The inner part turns back to its original state (with bottle number 1 facing the door). This was done so that you can turn off the BoozeBuddy again and it will still know which bottle is positioned where. The videos below show interaction with the BoozeBuddy.

Left: Complete interaction with the BoozeBuddy.
Middle: Shows how the door works.
Right: Shows how the ball bearing affects the rotation.

Full interaction

The complete interaction with the BoozeBuddy. Shows the functionality of the LEDs, door, "Suprise me" functionality and rotating center.

Door

Shows the opening and closing functionality of the door, but still without the LEDs.

Ball bearing

Shows how the bearing affects the smoothness of the rotation, also shows the large gear on top of the center part of the BoozeBuddy.

Liquor bottles are rather heavy, and this weight may be unevenly divided, since not all bottles may be present or equally full. I managed this with a few tricks. Firstly, I designed the BoozeBuddy to have its bottles stand upright, and rotate them horizontally. This means that the motor won't ever have to lift any bottles.

I made an improvised ball bearing using marbles. These are cheap and available. I made the bearing very wide so that the center of mass of the bottles always falls on the inside, and the rotating part of the BoozeBuddy won't be at an angle.

I also used gears. This was also useful to be able to control the rotation more accurately. The entire upper plane of the rotating inner part is a huge gear. This is beneficial due to its size, but also because it's very well secured and can properly transfer the force applied to it.

The smaller gear is attached to a powerful NEMA 17 Stepper motor, powered by an A4988 driver and a 12V power supply.


Magnet Lamp


Tinkering Projects - Magnet LED Lamp

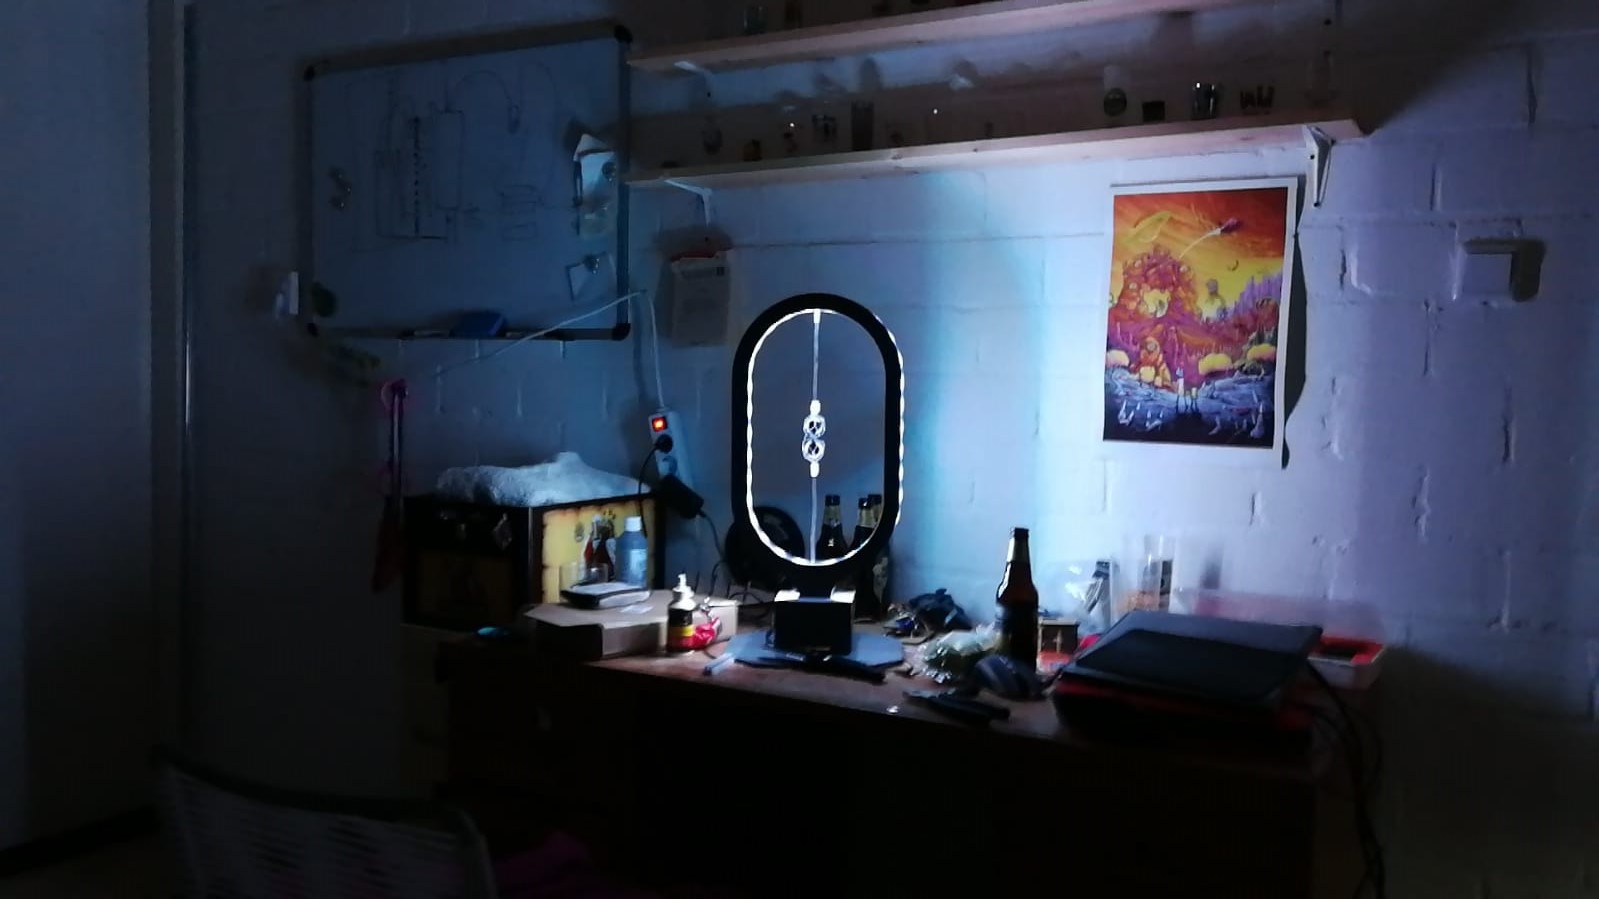
The Magnet Lamp is one of those projects that I still use every day. I decided to make this when I saw an add on Instagram for a similar type of lamp. It would be turned on if you connect the 2 spherical magnets inside. That one cost $80, mine was only €20,-.

It works as follows: The ground wire of the light is directly connected, but the plus wire is cut in half. One side is attached to a magnet at the bottom of the lamp, another one goes all the way around one side to the top and is attached to a magnet there. It turns out it’s near impossible to drill a hole in a magnet, so instead the magnets are wrapped in tin foil. Connecting the magnets closes the circuit and the light turns on. Due to the low voltage, touching the wires is completely safe.

Tinkering Projects - Magnet LED Lamp Inside (Cross - section)

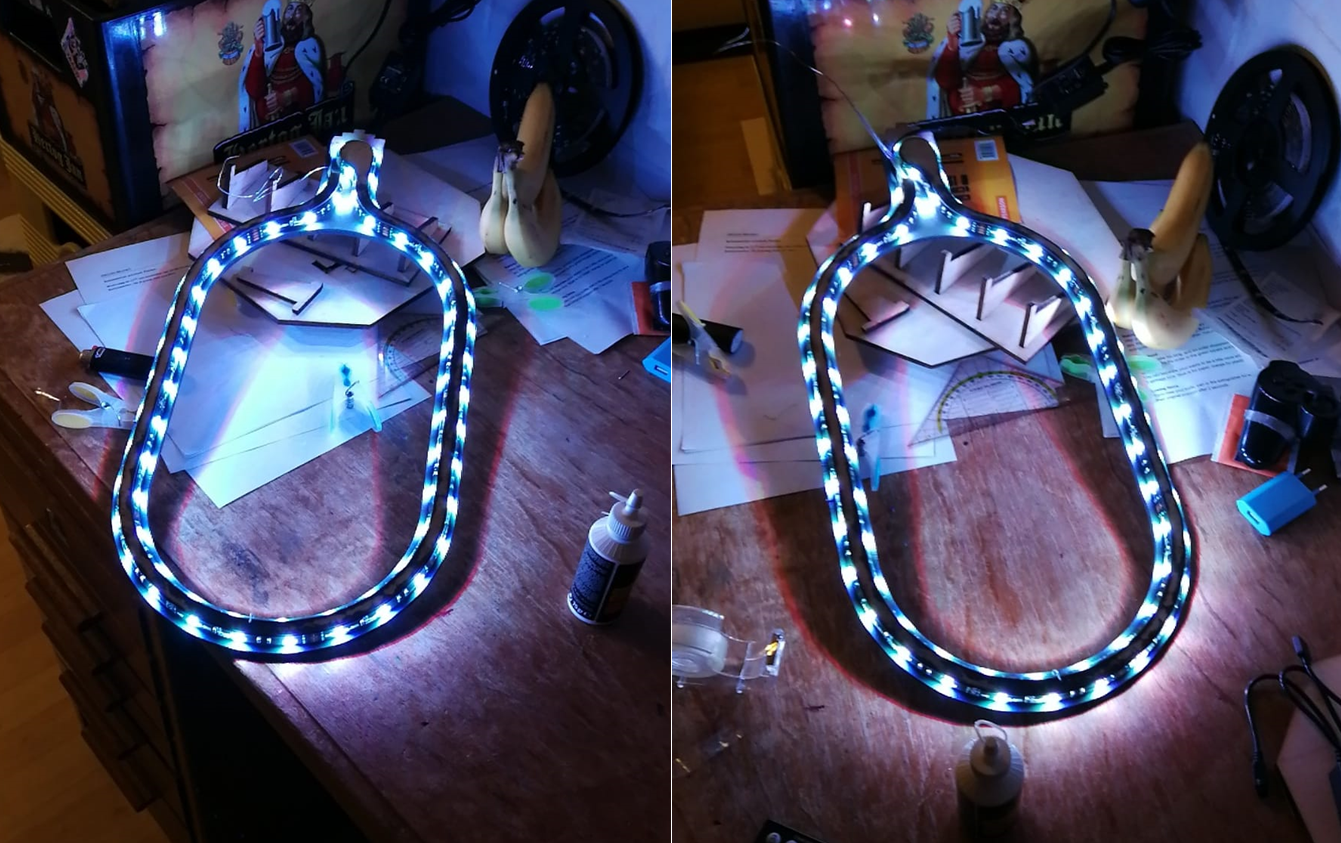
The lamp consists of an RGB LED strip wrapped around some 2 layers of 4mm lasercut plywood, enclosed by 2 more layers of plywood. The LED strip first goes all the way around the outside, then inside of the basis it is bent 180 °, and it makes its way within the inside of the lamp.

The LED strip is enclosed by a larger piece of wood on either side. This ensures that the light doesn’t shine directly into your eyes and creates a nice, ambient light. It also makes the LED strip appear more as one light, rather than a series of small lights. You can still distinguish the individual lights if you look from the side. I've thought about adding some matt, transparent acrylic strip to diffuse the light some more, but eventually decided that it was fine like this.

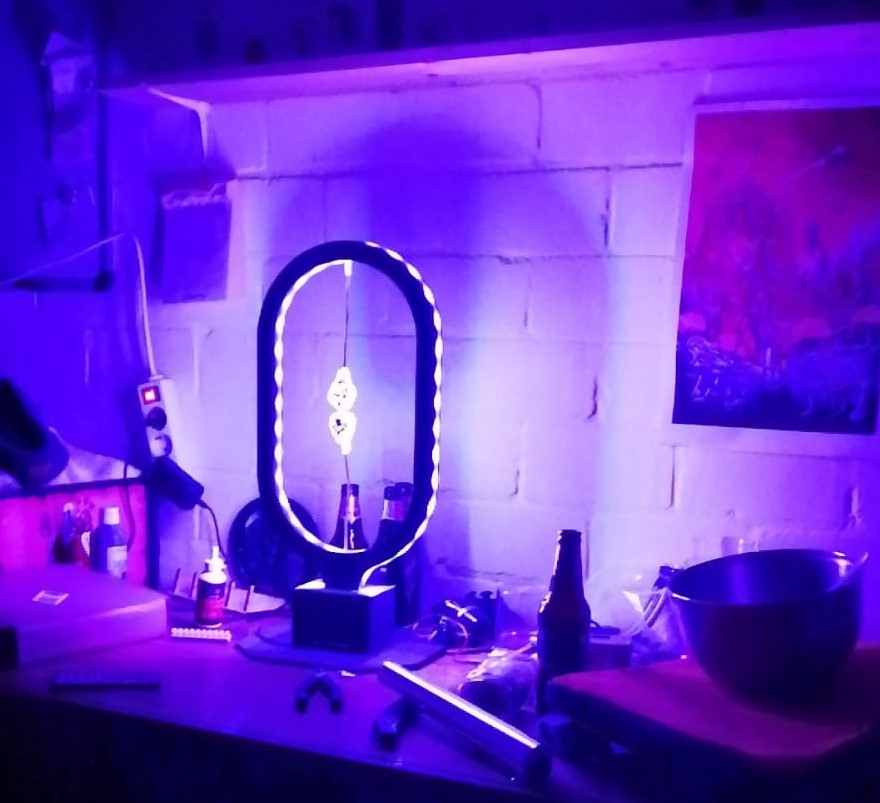
Tinkering Projects - Magnet LED Lamp (Colored Light)

I used a cheap LED strip from the Action. These come with a small remote that allows you to change brightness, color & pattern. The remote can be placed within a small gap in the base of the lamp and can still be used to control all the settings, as well as to turn the light on or off, even when the magnets are connected.

But nothing beats turning the lamp of by just throwing something against the magnets or punching them softly. It seems silly, but this really is the primary reason why this is the best lamp in the world. It's not just that I made it myself or that the light has a nice diffusion and color. The playful design makes this lamp fun to use, even if it's arguably less user-friendly than a regular, boring switch.

I also had the idea to make another version of this lamp where the magnets don't have to touch. I would've liked it if the magnets had been perfectly spherical and smooth, rather than covered in tin foil. I could make a system where the tension on the rope attached to a magnet can open and close the circuit.


TopDesk


TopDesk is without a doubt the largest, most time-consuming and most expensive project on this entire page. Arguably, it deserves its own place on my portfolio. But since it's still technically just a hobby project, I'll just place it here. It kept me busy during an entire summer break.

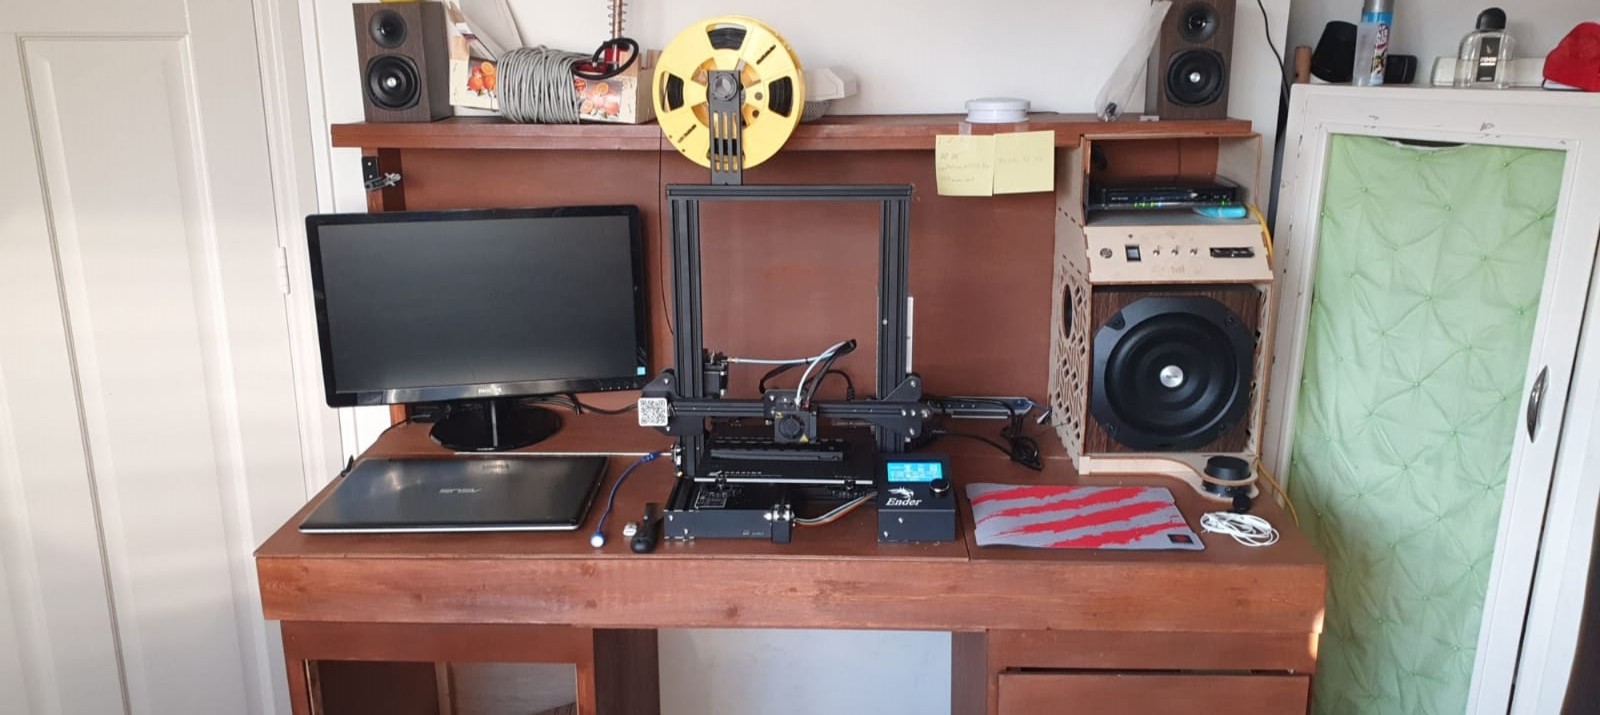
TopDesk is the name for a desk that I build for myself. I figured: "I spend a lot of time behind a computer, I might as well ensure that I have a nice work environment".

Tinkering Projects - TopDesk


This project took a lot of planning. I had to decide what features the desk would have, as well as every exact measurement and material. I started working on some requirements, hoping that they would give shape to the rest of the project. I looked at ergonomics and consulted scientific literature. I also paid extra attention to everyday stuff that I unconsciously enjoyed, such as tables with a perfect height. This process led me to the list of requirements and solutions you see below.

Tinkering Projects - TopDesk Drawers

Storage

I want sufficient storage. On both sides of me there would be a cabinet that could hold stuff. But the amount of storage alone isn't enough. I want everything to be easily accessible and categorized. The design of the desk itself should also encourage me to keep it organized. I want to have a naturally clean desk without this requiring significant conscious effort.

I quickly realized that the amount of storage isn't usually the problem, but rather the fact that a lot of it is wasted on stuff you never actually use. The clutter on the desk is usually caused by laziness. You need to put something somewhere so just put it here.

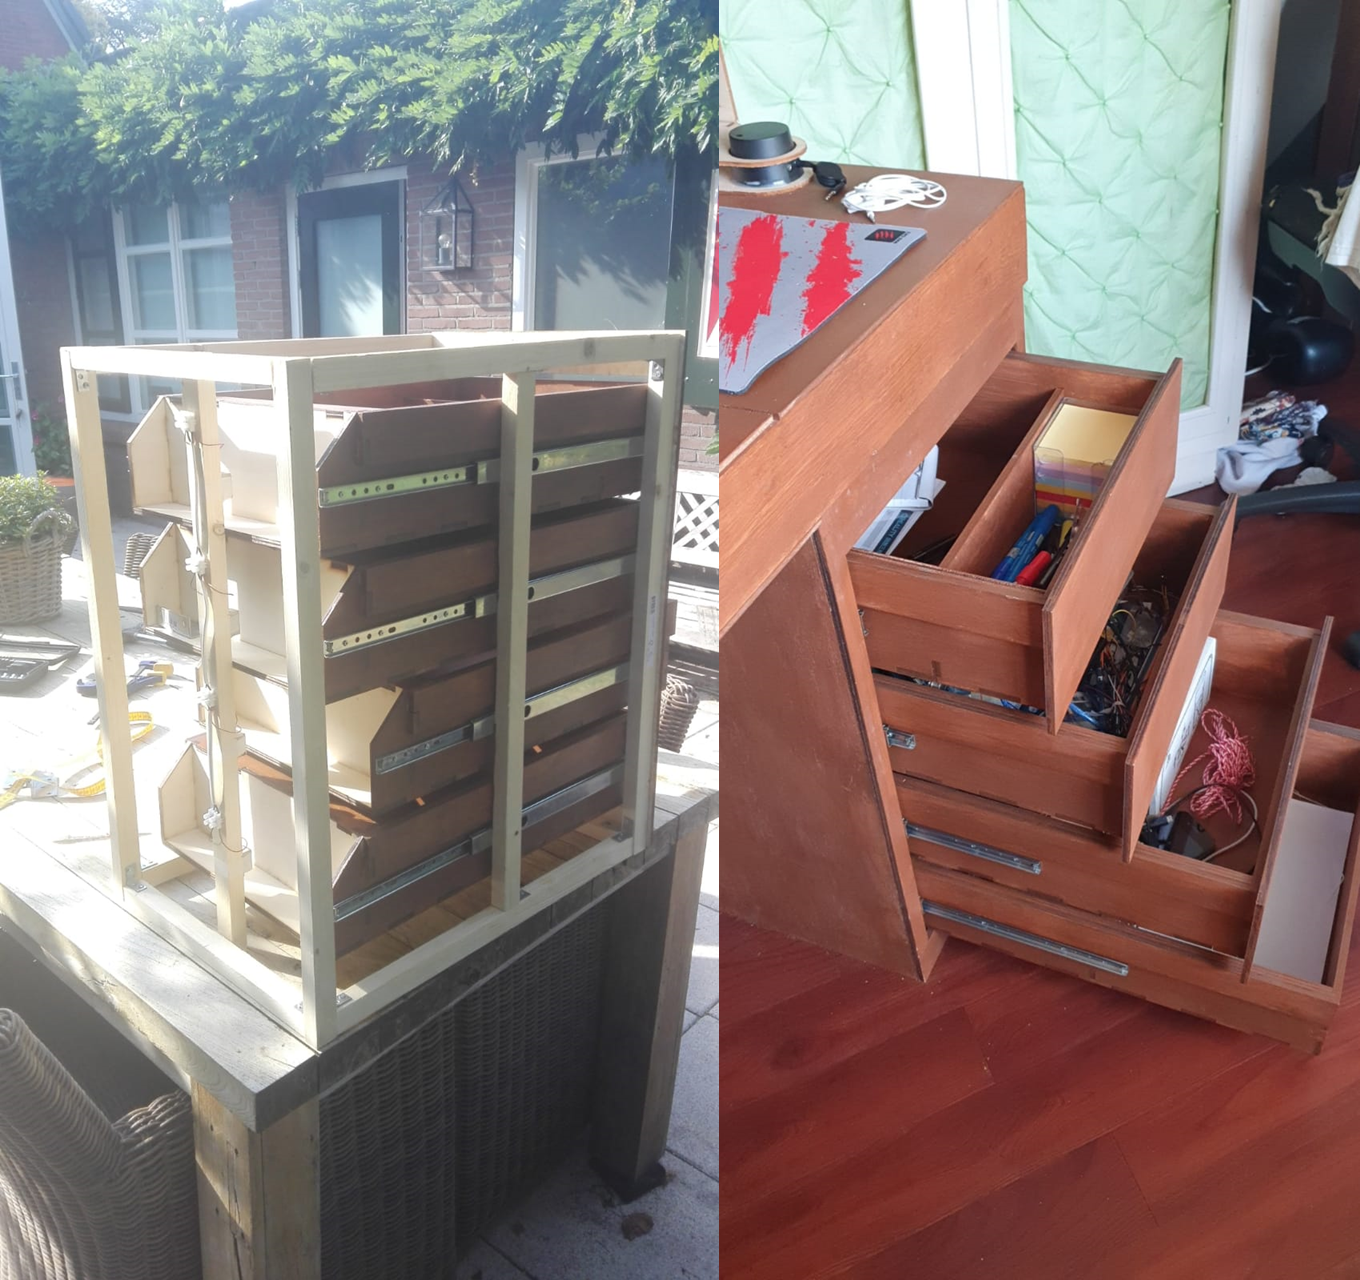
The cabinet on the right side contains 4 large drawers. Each drawer is designed for a specific purpose. The top one is for everyday use and contains post-its, pens, markers, small tools, USB sticks, as well as some books and notebooks. The drawer beneath that one contains Arduino parts and cables. The drawer beneath that one contains books and tools. The drawer at the bottom contains a stash of blank paper and has a section for random stuff which would otherwise clutter other parts of the desk.

Tinkering Projects - TopDesk 3D Model (Open)

I kept the left cabinet completely open to potentially add something in the future. At the moment it's where I keep my garbage bin.

The desk itself can open as well. This was partially done to add storage space, but also to encourage myself not to leave stuff on the desk, since it won't open anymore. The scenario I had in mind was that if I was done, I'd just open my desk and put my laptop inside.

Above the desk is a shelf. I really wanted this for a number of reasons. But one of the most important ones is that this prevents clutter. All the stuff that you usually just put on the desk can now go on there, keeping the desk clean. It also holds 2 speakers and a rubber duck.

Tinkering Projects - TopDesk LED Light

Light

I want my desk to be well-lit. The light should be well diffused and ambient. I should never be blocking my own light. The light must be controllable in both color and brightness as well.

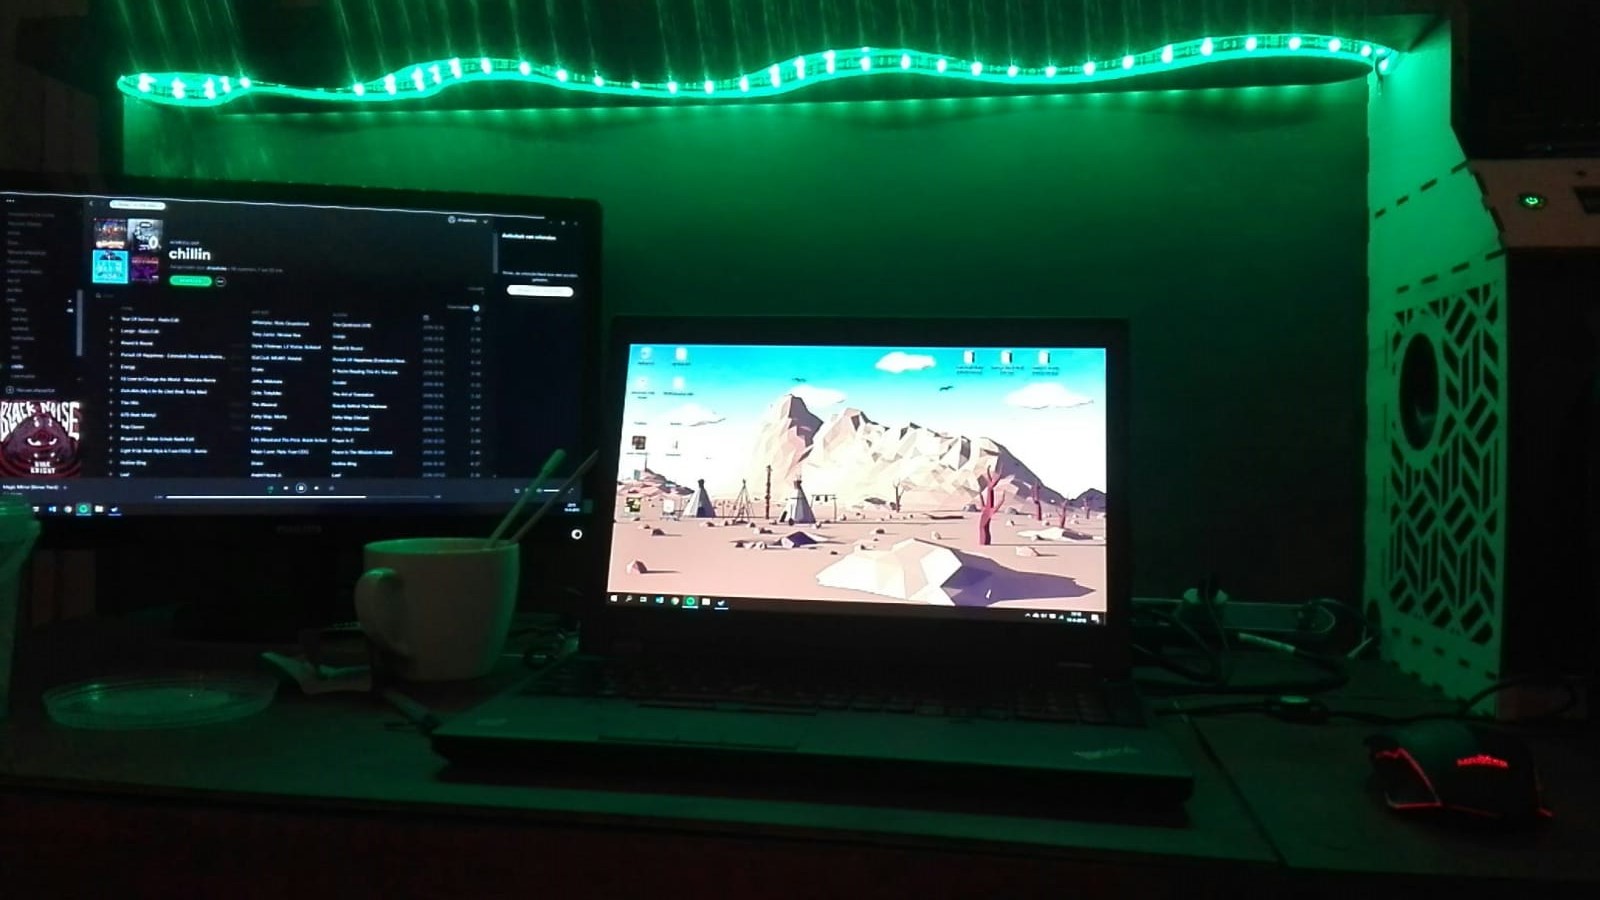
I used RGB LED strips for the lighting. These are controllable in brightness and color using a remote. The above-mentioned shelf consists of 2 separate boards. The top one is solid, but the bottom one has a shape carved inside and is a bit less wide. The LED strip is wrapped inside this shape. Since the shelf is about at the height that your head would be, the light will never shine directly into your eyes, but instead diffuses and lights up the working area.

Tinkering Projects - TopDesk Sound System & Control Box

Sound

I want to have high-quality sound and have full control over this sound. There should be a large volume button near my mousepad. The speakers should be embedded and not too present. The desk also shouldn't vibrate when the volume or bass is very high.

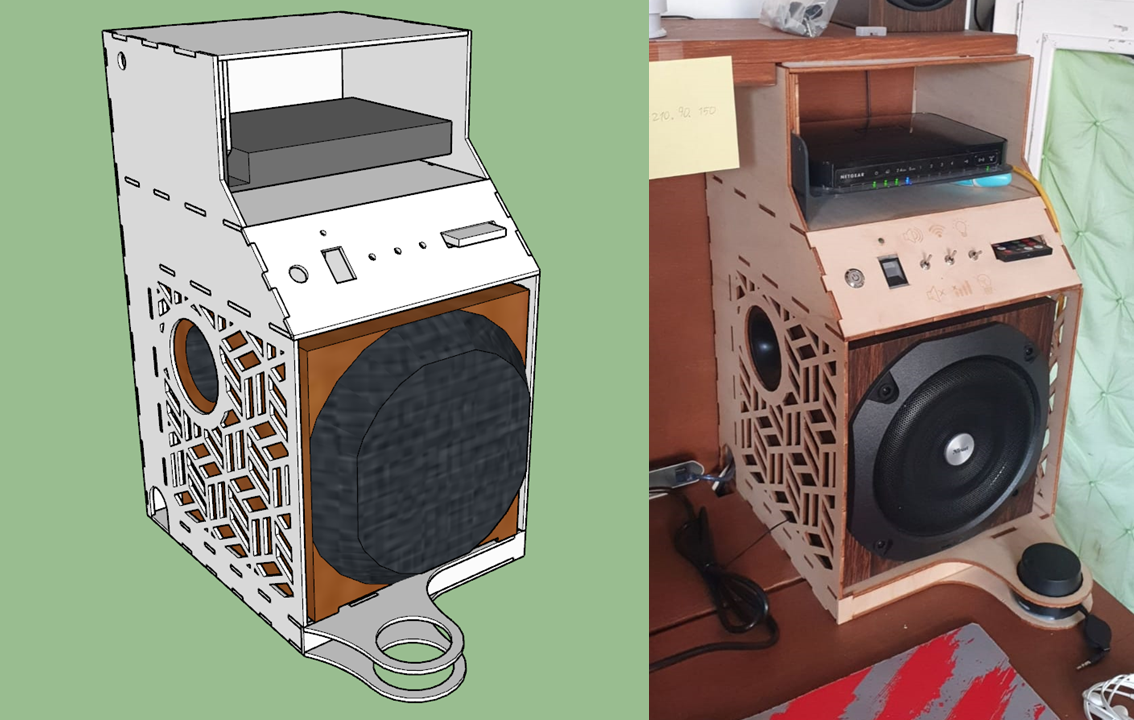
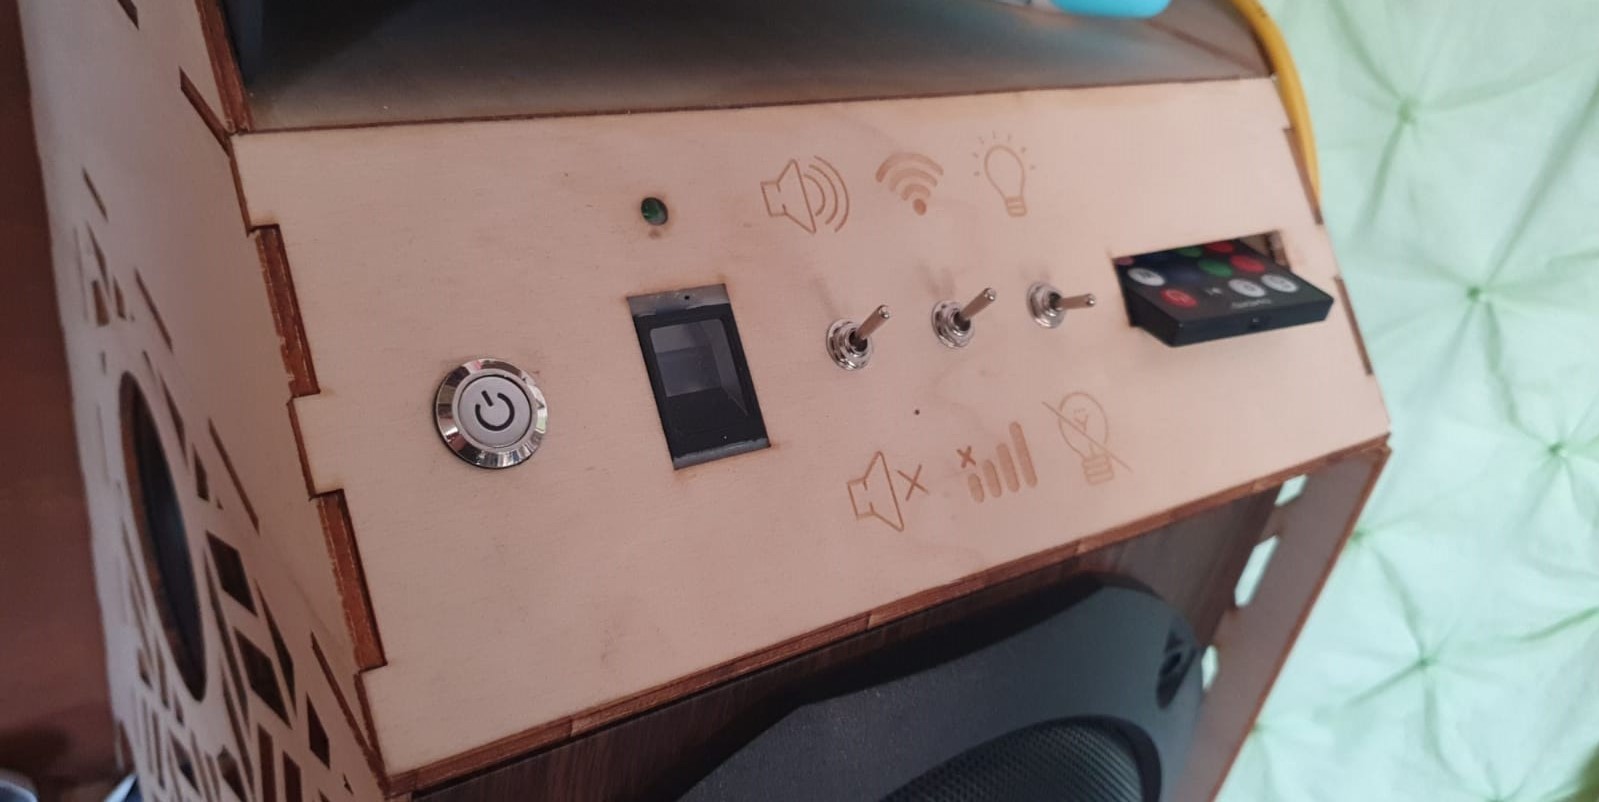
I embedded a set of speakers in the desk. The subwoofer is concealed inside a decorated lasercut box that also contains the modem and other electronics. The volume button is right above the mousepad, allowing me to easily and quickly adjust the volume. The AUX cable is retractable, so when I do not use the speakers, it is not in my way.

Security

The files and other stuff I keep in my desk, as well as some of the features of the desk itself, should be exclusively accessible to me. So, not only should people not be able to access my stuff, they also shouldn't be able to control the lighting or sound settings.

The abovementioned 4 drawers each have an electronic lock. This locks them when the desk is turned off. To turn on the desk, you must scan your fingerprint. This takes only a few seconds and is very secure. After having successfully scanned your fingerprint, the drawers will be unlocked, and you'll be granted control over the lighting and sound as well. The Wi-Fi can be controlled without fingerprint, because the rest of my house can use it as well.

Naturally, the desk should be strong and robust and not break easily. This requirement isn't exclusive to security purposes but also exists because of other reasons. E.g. I might want to be able to stand on it.

Tinkering Projects - TopDesk Power Supply

Power Supply

I want to have high-quality sound and have full control over this sound. There should be a large volume button near my mousepad. The speakers should be embedded and not too present. The desk also shouldn't vibrate when the volume or bass is very high.

I embedded a set of speakers in the desk. The subwoofer is concealed inside a decorated lasercut box that also contains the modem and other electronics. The volume button is right above the mousepad, allowing me to easily and quickly adjust the volume. The AUX cable is retractable, so when I do not use the speakers, it is not in my way.

Tinkering Projects - TopDesk Control Box

Internet

I want to have proper internet when I sit behind my desk. This means that it should have a modem embedded inside. I also want to have the option to use an ethernet cable, rather than Wi-Fi. The modem is controlled via the control box so that I can quickly restart it in case of a malfunction.

Ergonomics

I'll probably be spending a lot of time behind this desk, so I want it to be ergonomic. Meaning that I should be encouraged to sit upright, my chair can fit underneath the desk, There are no sharp corners poking me and there is nothing to stub my toes against.

Second monitor

I use a second monitor as well. The HDMI cable is embedded inside the desk and retracts when not used.

After a lot of work, I finally made a desk that fits all these requirements and named it TopDesk. I still use it to this day.


Web Scraper for Sketchup 3D Warehouse


I've done a lot of 3D modelling, most of it using Google's Sketchup. I've made a lot of these models publicly and freely available in the Sketchup 3D Warehouse. My 3D Modelling Portfolio shows an overview of these models.

In an ideal world, every service would provide a user-friendly API that I could use to show these models on my website. Sketchup doesn't have this, however. They do provide a means to embed a 3D model such that you're able to look at it in 3D on your website, which is cool in and of itself. But I have no real means to retrieve data from the Sketchup Warehouse.

This isn't usually a problem, since I could simply use an SQL database with the relevant data, which is actually what I currently do.

For most things, like model names and descriptions, this works just fine. But the statistics (number of likes, views & downloads), which can change on a daily basis, are a different story. I want the statistics to be up to date, but I also don't want to have to update them manually. So, I wrote a quick program that does this for me.

Tinkering Projects - Sketchup 3D Warehouse Web Scraping

Fun fact: The code you see in the background of the image is the actual page source code of one of my Sketchup models.

The type of program that I've written is called a Web Scraper. It works as follows:

First, I retrieve the source code of a specific web page using CURL (you can also see this by using right mouse button -> view page source on Google Chrome). I identify the relevant information (the number of Likes, Views & Downloads) and use a RegEx to filter this piece of text out of the page. I then make an Ajax request using jQuery to update these statistics in my own database. I do this for every model that I have in my database.

This is actually surprisingly easy to do. However, the Sketchup Warehouse website makes it a bit more difficult. This website doesn’t allow non-users to do this. So, I essentially have to login every time I scrape a page on this site.

Like most other websites, Sketchup Warehouse checks this by using cookies. So, I monitored my own cookies and form info whilst logging in and saved their settings in a separate file. This file is used every time you scrape a page.

This program is run automatically once a week, but can also be controlled manually by visitors of my website.

Source code


Check out the source code on GitHub by clicking the button below. Note that it still contains some unused variables and commented out print statements. I've kept these in so that anybody who attempts a similar project in the future can get a headstart on debugging.

View code

Predator's Lasergun


Tinkering Projects - Predator Alien Banner (wide)

I've built a lasergun similar to the ones used by the Predator aliens. I had been meaning to build a lasergun for a while. This idea was originally inspired by a video by Styropyro on YouTube. His account makes videos about all things lasers and is pretty popular. His channel has been a great help for me during this project.

Tinkering Projects - Predator LaserSights movie screenshots

So, as mentioned before, the lasergun I built is inspired by the one used by the Predator aliens in the Predator franchise. I'm a big fan of this cult classic and I've seen every movie it has released so far. And from the numerous badass features the predator aliens have, none is as iconic as their trade-mark laser sights. I adopted these in my design.

I used 5mW red laser modules for aiming, and a strong 50mW green laser to shoot with.

The main laser originally came with 2 switches, a key switch on the end to activate it, and a button to control the laser. I removed the key switch and added a relay module instead. I could've simply used the trigger button instead, but I wanted to add other features such as a 'safe' option and indicator LEDs. This required a microcontroller, so I used a combination of relays and an Arduino Nano to control the lasers.

The gun contains 4 buttons. One is a 3D printed switch that activates the battery and starts up the laser. Then there are 2 switches inside of the control box. One activates the predator laser sights, and the other one controls the safe setting. There are 2 indicator LEDs to indicate whether the safe is on or off (green = safe, red = armed). The last button is the trigger, of course.

On the outside, the amount of battery left is shown by a maximum of 4 small blue LEDs. You can charge the battery via a micro USB port located at the bottom of the handle.

I've gone through many redesigns for this project. I initially had it planned such that the battery was oriented horizontally, but I discarded this concept because I thought the gun would be too wide. I had also originally planned for a part of the gun to be lasercut, but due to Corona, I didn't have access to a laser cutter and therefore decided to 3D print the whole thing on my Ender 3. I gained a lot of valuable experience with 3D printing from this project too, since I had only recently purchased my 3D printer at the time.

One design element of this gun that deserves extra attention is the handle. This handle is modelled after my own hand. I did this by first making it out of foam in the workshop. I then measured and modelled this foam model. It still took a few prints before it was perfect. The pinky was at a slightly wrong angle or there was a small bump where my thumb was supposed to go. But after a few tries, it was perfect.

Initial Design

Tinkering Projects - DIY 3D printed Predator Lasergun (Initial Design) Tinkering Projects - DIY 3D printed Predator Lasergun (Initial Design - Open)

The original design I had planned for the laser gun.

This allows you to open the battery holder in a fashion that is typical of guns. The idea was that you could even pull out the battery and insert a new one. The buttons would be incorporated into the rectangular middle part or behind the main laser

Final Design

Tinkering Projects - DIY 3D printed Predator Lasergun (Final Design) Tinkering Projects - DIY 3D printed Predator Lasergun (Final Design - Open)

The final design I eventually went with.

The battery is now oriented horizontally, which makes the gun smaller and enables you to see the amount of battery left without opening the control box. It also lessens the amount of stress on the small hook that keeps this compartment closed

Do It Yourself


If you're feeling jealous, and want to own such a gun yourself, you can! I designed, modelled and programmed everything myself, so I'm free to share it as I want. Everything that I've made during this project is publicly available.

The table below describes the required components and provides links to the ones I used (I used a Dutch website for most, so I cannot guarantee that the same components will be available in another country). On the right you can find the schematics of the circuit, and an interactive 3D model (with a download link as well). Further down you will find download buttons for both the source code and the .STL files.

There is no full-blown tutorial for the assembly of this gun, but the design is rather self-guiding. I encourage you to play around with the 3D model to find the correct assembly order.

Components

Component Amount required
HLM1230 Red Laser Module 3
Relay Module 2
Push button 1
Switch 2
Micro USB extension cable 1
Main Laser 1
Green LED 3mm 1
Red LED 3mm 1
LED holder 2
Denver Powerbank 1
Arduino Nano 1
Resistor 220 Ω 2
Resistor 10K Ω 3
Resistor ≅ 70 Ω 1
Nuts & Bolts (preferably M3 / M4) -
Wires -
3D printer -
Double sided tape -

3D Model

Schematics

Tinkering Projects - DIY Predator Lasergun Electronics Schematic (Fritzing)

STL Files & Arduino Code


Click the button below to download the .STL files and the Arduino code.

Download files

Instagram & Twitter Memebot


If you know me or have read about other projects of mine such as the Shooting Stars Meme Generator, you'll know that I love memes. Memes are just a great source of online entertainment. Good memes are creative, unique, and layered, making them feel like inside jokes you share with online strangers.

That being said, there is one thing that I absolutely despise about memes as they are now, and that is shameless reposting. People stealing memes from others and presenting them as their own. As bad as that is in and off itself, I mainly hate seeing a certain post 10 times, even if it's a good meme.

I use Instagram and Reddit for memes and have used Twitter in the past as well. Reddit is a bit different than Instagram and other social media platforms in the sense that on reddit, you subscribe to subreddits, rather than accounts. This means that you subscribe to a certain topic, and all posts in that subreddit must relate to that specific topic. If the topic is memes, a certain meme will only be posted once on that subreddit, since reposts are automatically deleted or downvoted into oblivion. On Instagram and other social media, you follow accounts, and by doing so, subscribe to everything one person posts. These posts may relate to multiple topics, but a certain topic can appear on multiple accounts as well. Most meme pages try to stick to memes as a topic. But what happens is, if one page has a good post, all other pages start copying that post and present it as if it were their own.

The average lifespan of a meme

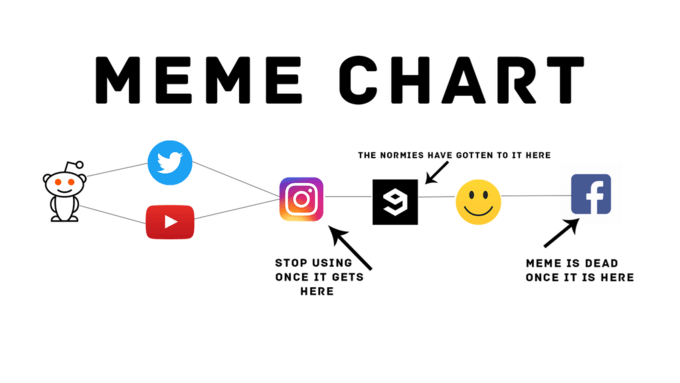
Every social media platform has their own reputation regarding reposts. Images like the ones you see here illustrate the general lifespan of memes. Although there are exceptions, it is stunning how on point these graphs sometimes are. It should be noted that every platform further along in the chain also often has their own little community that makes OC memes for that platform, and some posts are reposted upwards in the chain as well.

To oversimplify: 4Chan, Reddit & Tumblr are generally the ones that make original content. YouTube, Instagram & Twitter have their fair share of original content but are very much guilty of reposting as well. Facebook, iFunny & 9GAG consist almost exclusively of shameless reposts and deserve all the shame they get.

My solution


Alright, so, what are we going to do about this problem? Well, I wanted to show these reposters how stupid it is what they're doing by automating the task. So, I wrote a Python script that automatically reposts memes from Reddit and gives credit to the OP of the meme as well. This would, hopefully, also make their existence less relevant, because there's now an alternative source of memes that doesn't post ads, isn't private, is quick and original, and gives credit to the original creators.

My memebot was originally planned for Instagram (@Reddit_Repost_Bot), but will also be on twitter as soon as Twitter approves my API request(@ReposterReddit).

The bot works as follows. First, I choose a subreddit to take a meme from. I have hardcoded a list of 7 subreddits ( 'r/memes', 'r/dankmemes', 'r/PornhubComments', 'r/RareInsults', 'r/suspiciouslyspecific', 'r/whitepeopletwitter' & 'r/me_irl' ). The subreddit that we're going to take a meme from is chosen randomly, with weighted probabilities (the subreddits with more posts on average are more likely to be chosen).

From this chosen subreddit, we then take the post that is the "Hottest" at the moment. "Hot" is a good factor to choose a meme from for my bot. "Hot" relates to how quickly a meme is rising to the top, and usually contains memes which are upvoted a lot during a short period of time. These usually are original, new, and funny memes. We automatically ignore posts without images, video or gif posts, moderator posts, and nsfw posts. The bot also marks posts that it has visited already, and skips those posts the next time.

The bot will then automatically download the image from this post and resize it to be square. Instagram allows non-square images, but only within a small margin, so being square by default seemed easier. The bot also automatically generates a caption for the meme, consisting of the original title, the original poster, and a message stating that the meme is automatically generated by a bot. Now it's time to post it to Twitter and Instagram.

For posting on Twitter I can simply use their API. Instagram's Legacy API will go offline in June 29, 2020, however, and they offer different APIs instead. But usage of those requires a Facebook account (which I don’t have and won't create because I ethically do not agree with Facebooks policy), so I had to work a bit differently. Instead, I used Selenium with a Chrome Driver.

What this does is automatically open a Google Chrome window, and (using mobile emulation), go to www.instagram.com. It will automatically log in and post the meme, as if a real human was doing it manually. This workaround allowed me to make this bot without using the Instagram API. The demo video on the left shows what this looks like on my server.

The script will then wait for a randomly selected time, ranging from 30 to 90 minutes, and post the next meme. The bot is hosted from my own server. By the time that you read this, I have hopefully received approval for the Twitter API usage and the bot will be online on both Twitter and Instagram.
Please support this project by following my memebot on Instagram (@Reddit_Repost_Bot), and Twitter (@ReposterReddit).


HyperCube


This is something that I had been meaning to make for the longest time; ever since I saw a promotional video by HyperSpaceLighting on YouTube. I’ve enjoyed working with colorful lights for a long time, as proven by the many projects on this website that use such lights (e.g. the Magnet lamp, Predator's lasergun, BoozeBuddy, or the TopDesk).

Tinkering Projects - HyperCube V1

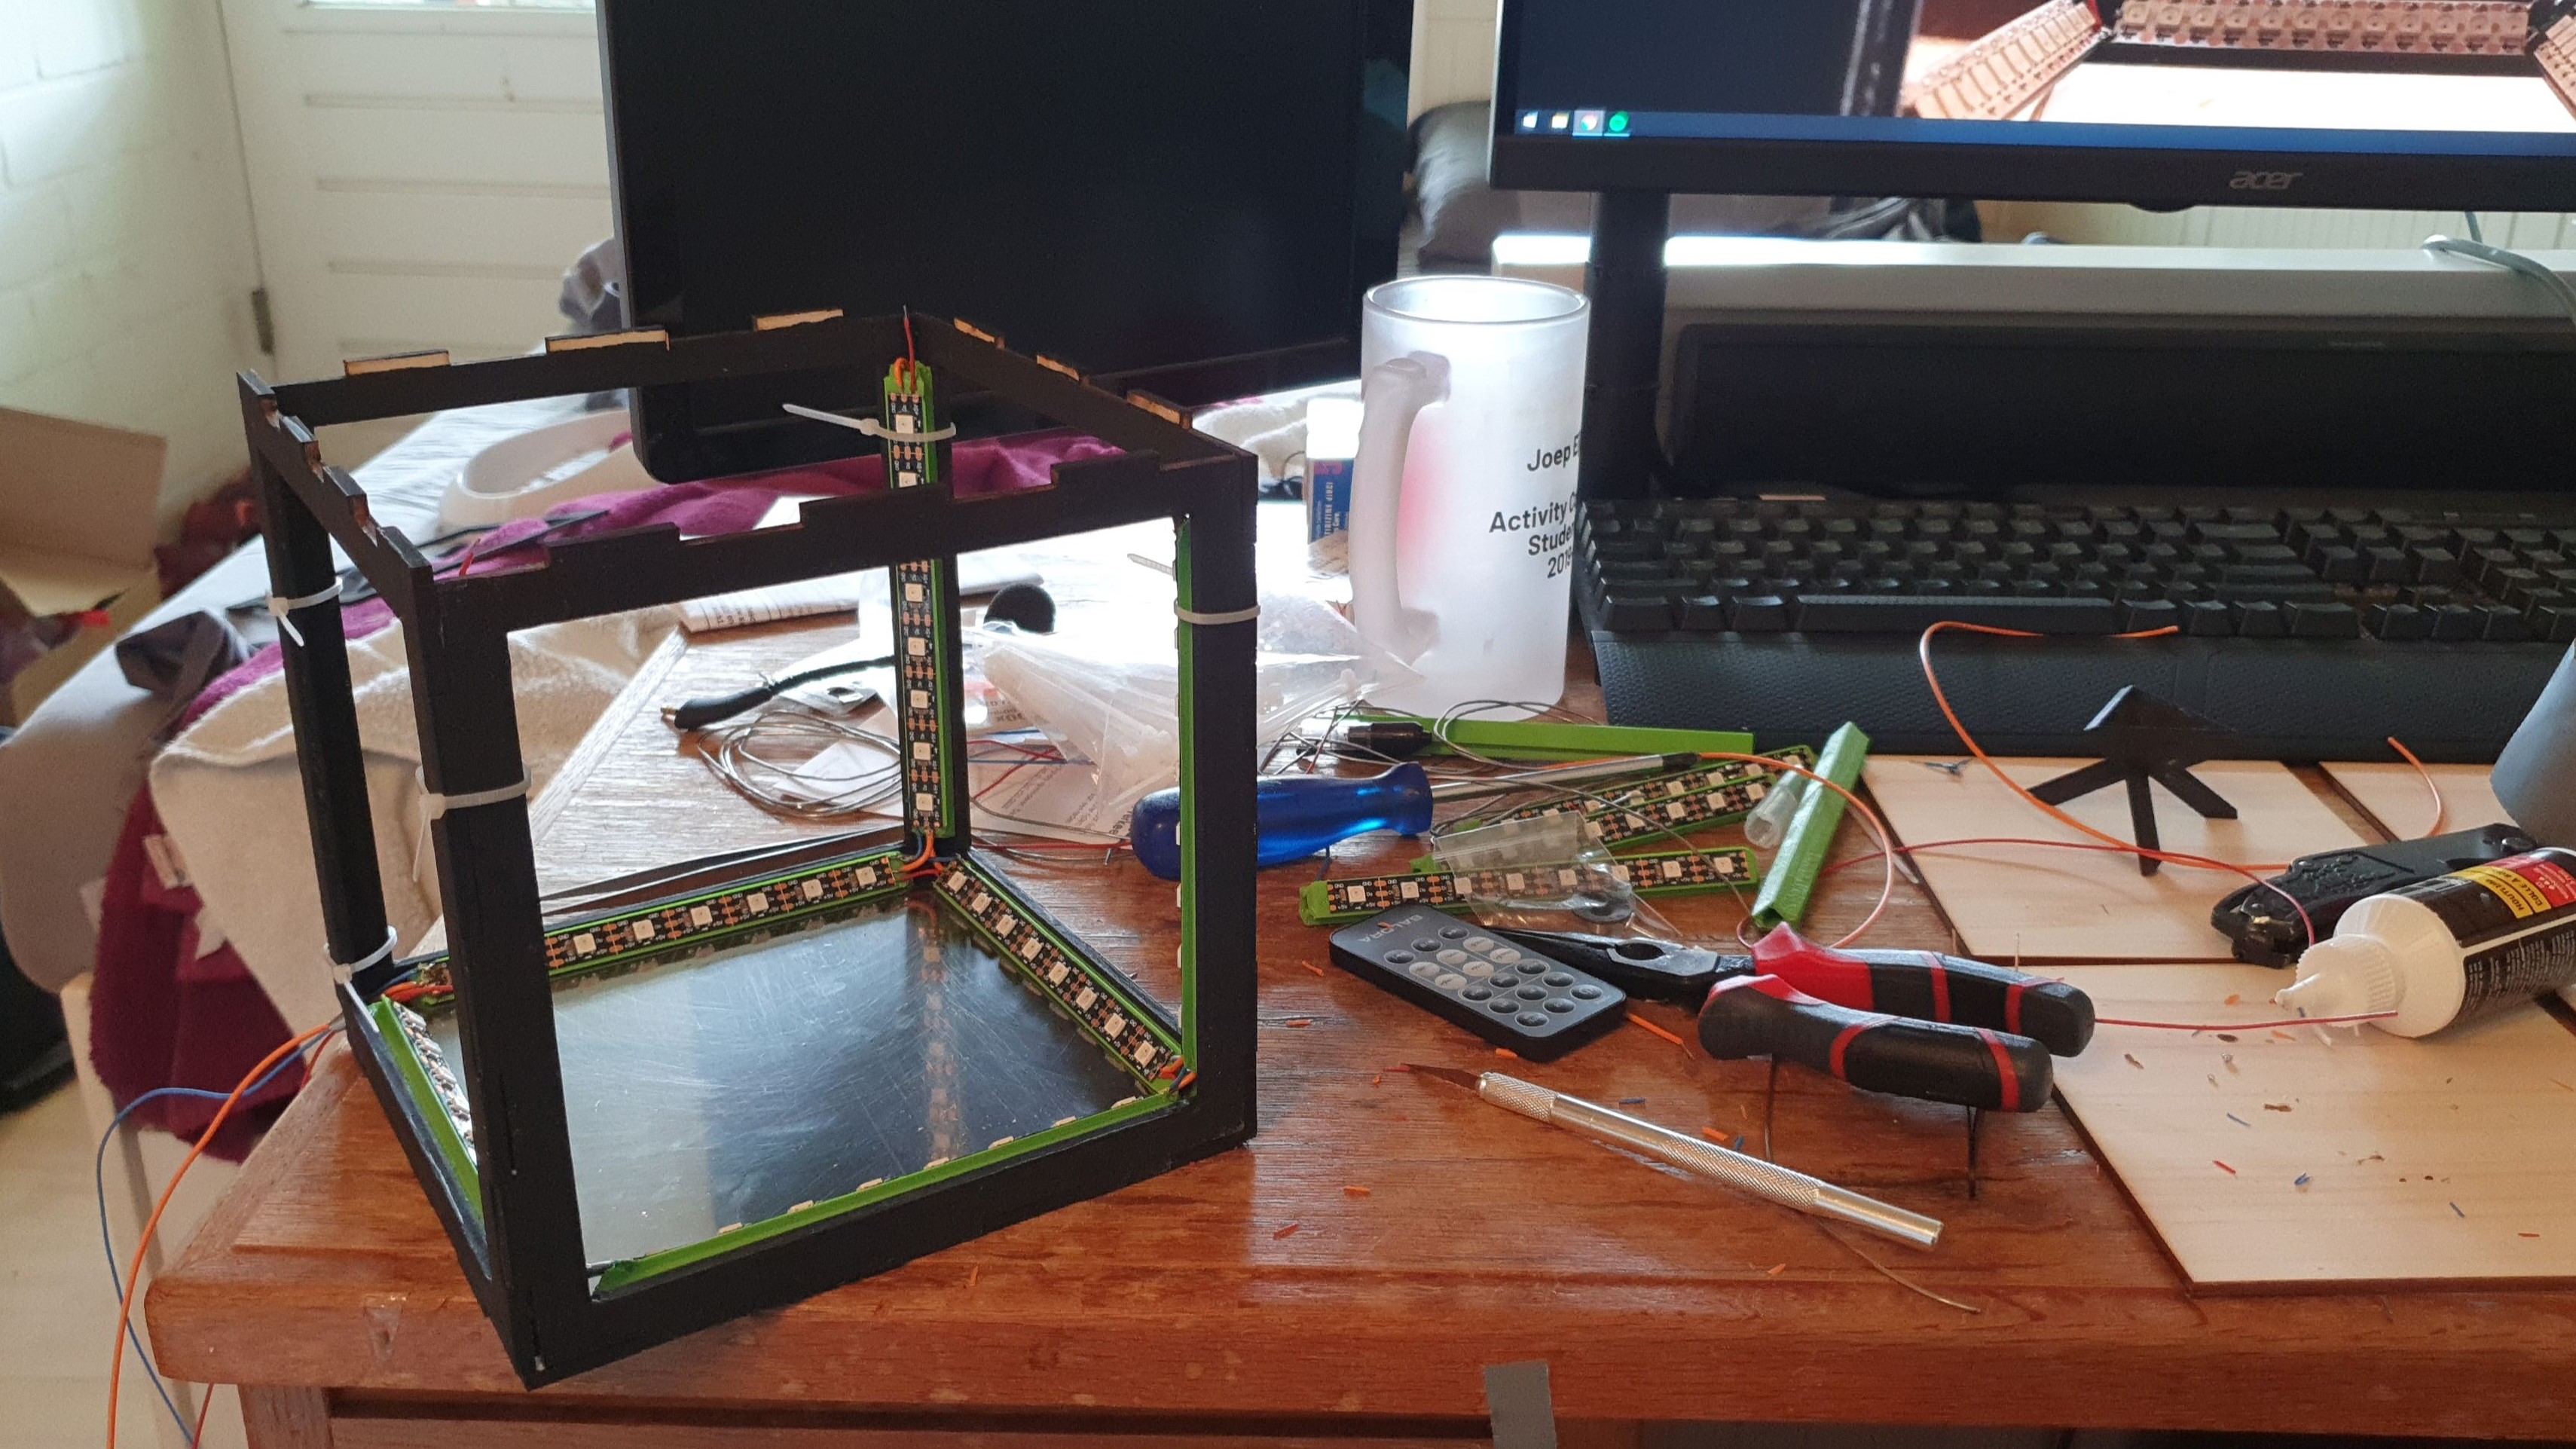
I finally saw my chance fit when following a course named Art, Mathematics, and Technology during my master Interaction Technology. The version I made for this course did not live up to my expectations, however. It was rather small and the mirroring effect didn’t work as well as I had hoped.

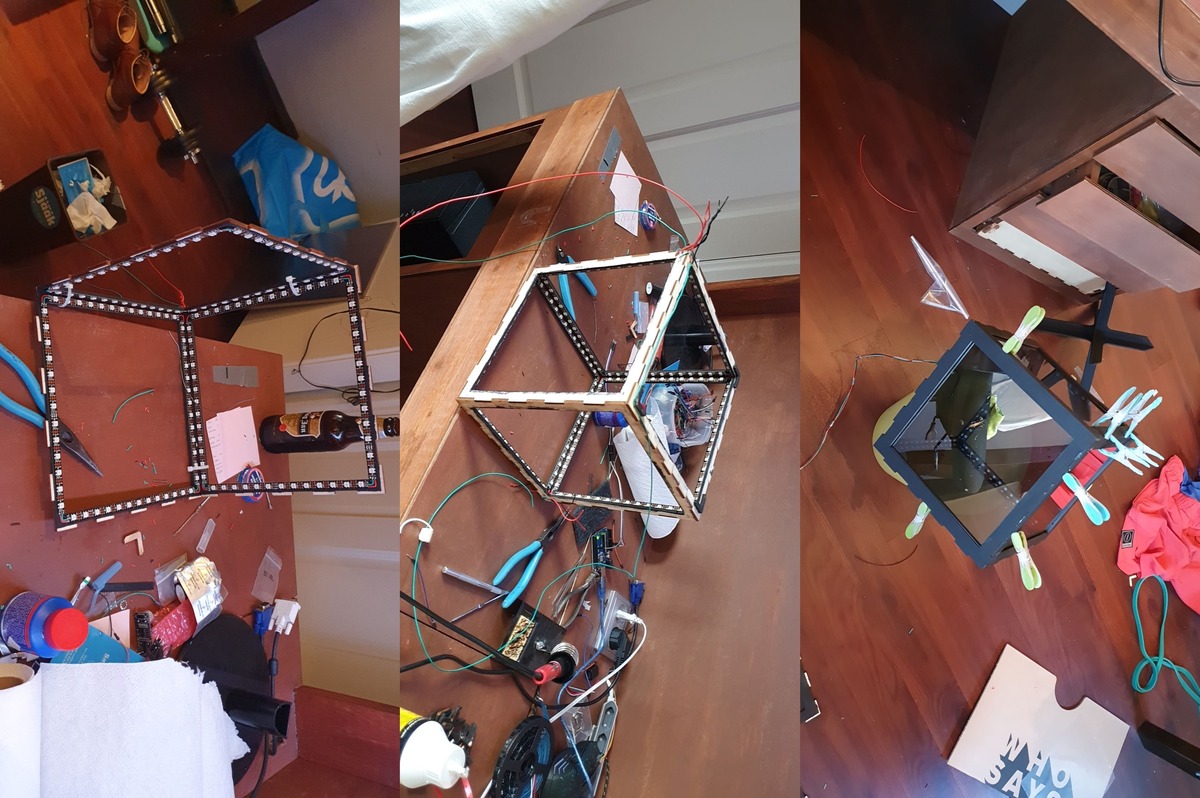
But rather than give up, I doubled down. I made a new design that would be much bigger and contained not only more LEDs, but also had a LED density twice as high as its predecessor. The semi-transparent mirrors also received an upgrade, because rather than mess about with reflective foil and acrylic plates, I ordered custom cut premade plates online.

Tinkering Projects - HyperCube V2

The new design also gave me more space for soldering and made for easier assembly. Using an Arduino Uno, I made a number of different programs for the cube to follow, which could be selected and adjusted (speed / brightness) using a 3D printed control box. The different programs include:

  • A single color, not animated.
  • Cycling colors by blinking.
  • Cycling colors by fading in and out.
  • Cycling colors by fading to the new color.
  • A single light that bounces around and leaves a fading trail.
  • Cycling colors by bouncing a single color-changing light around that leaves a trail of its current color.
  • A sparkle where lights are turned on and off randomly.
  • A fire like effect where the light rose up and down from the bottom.

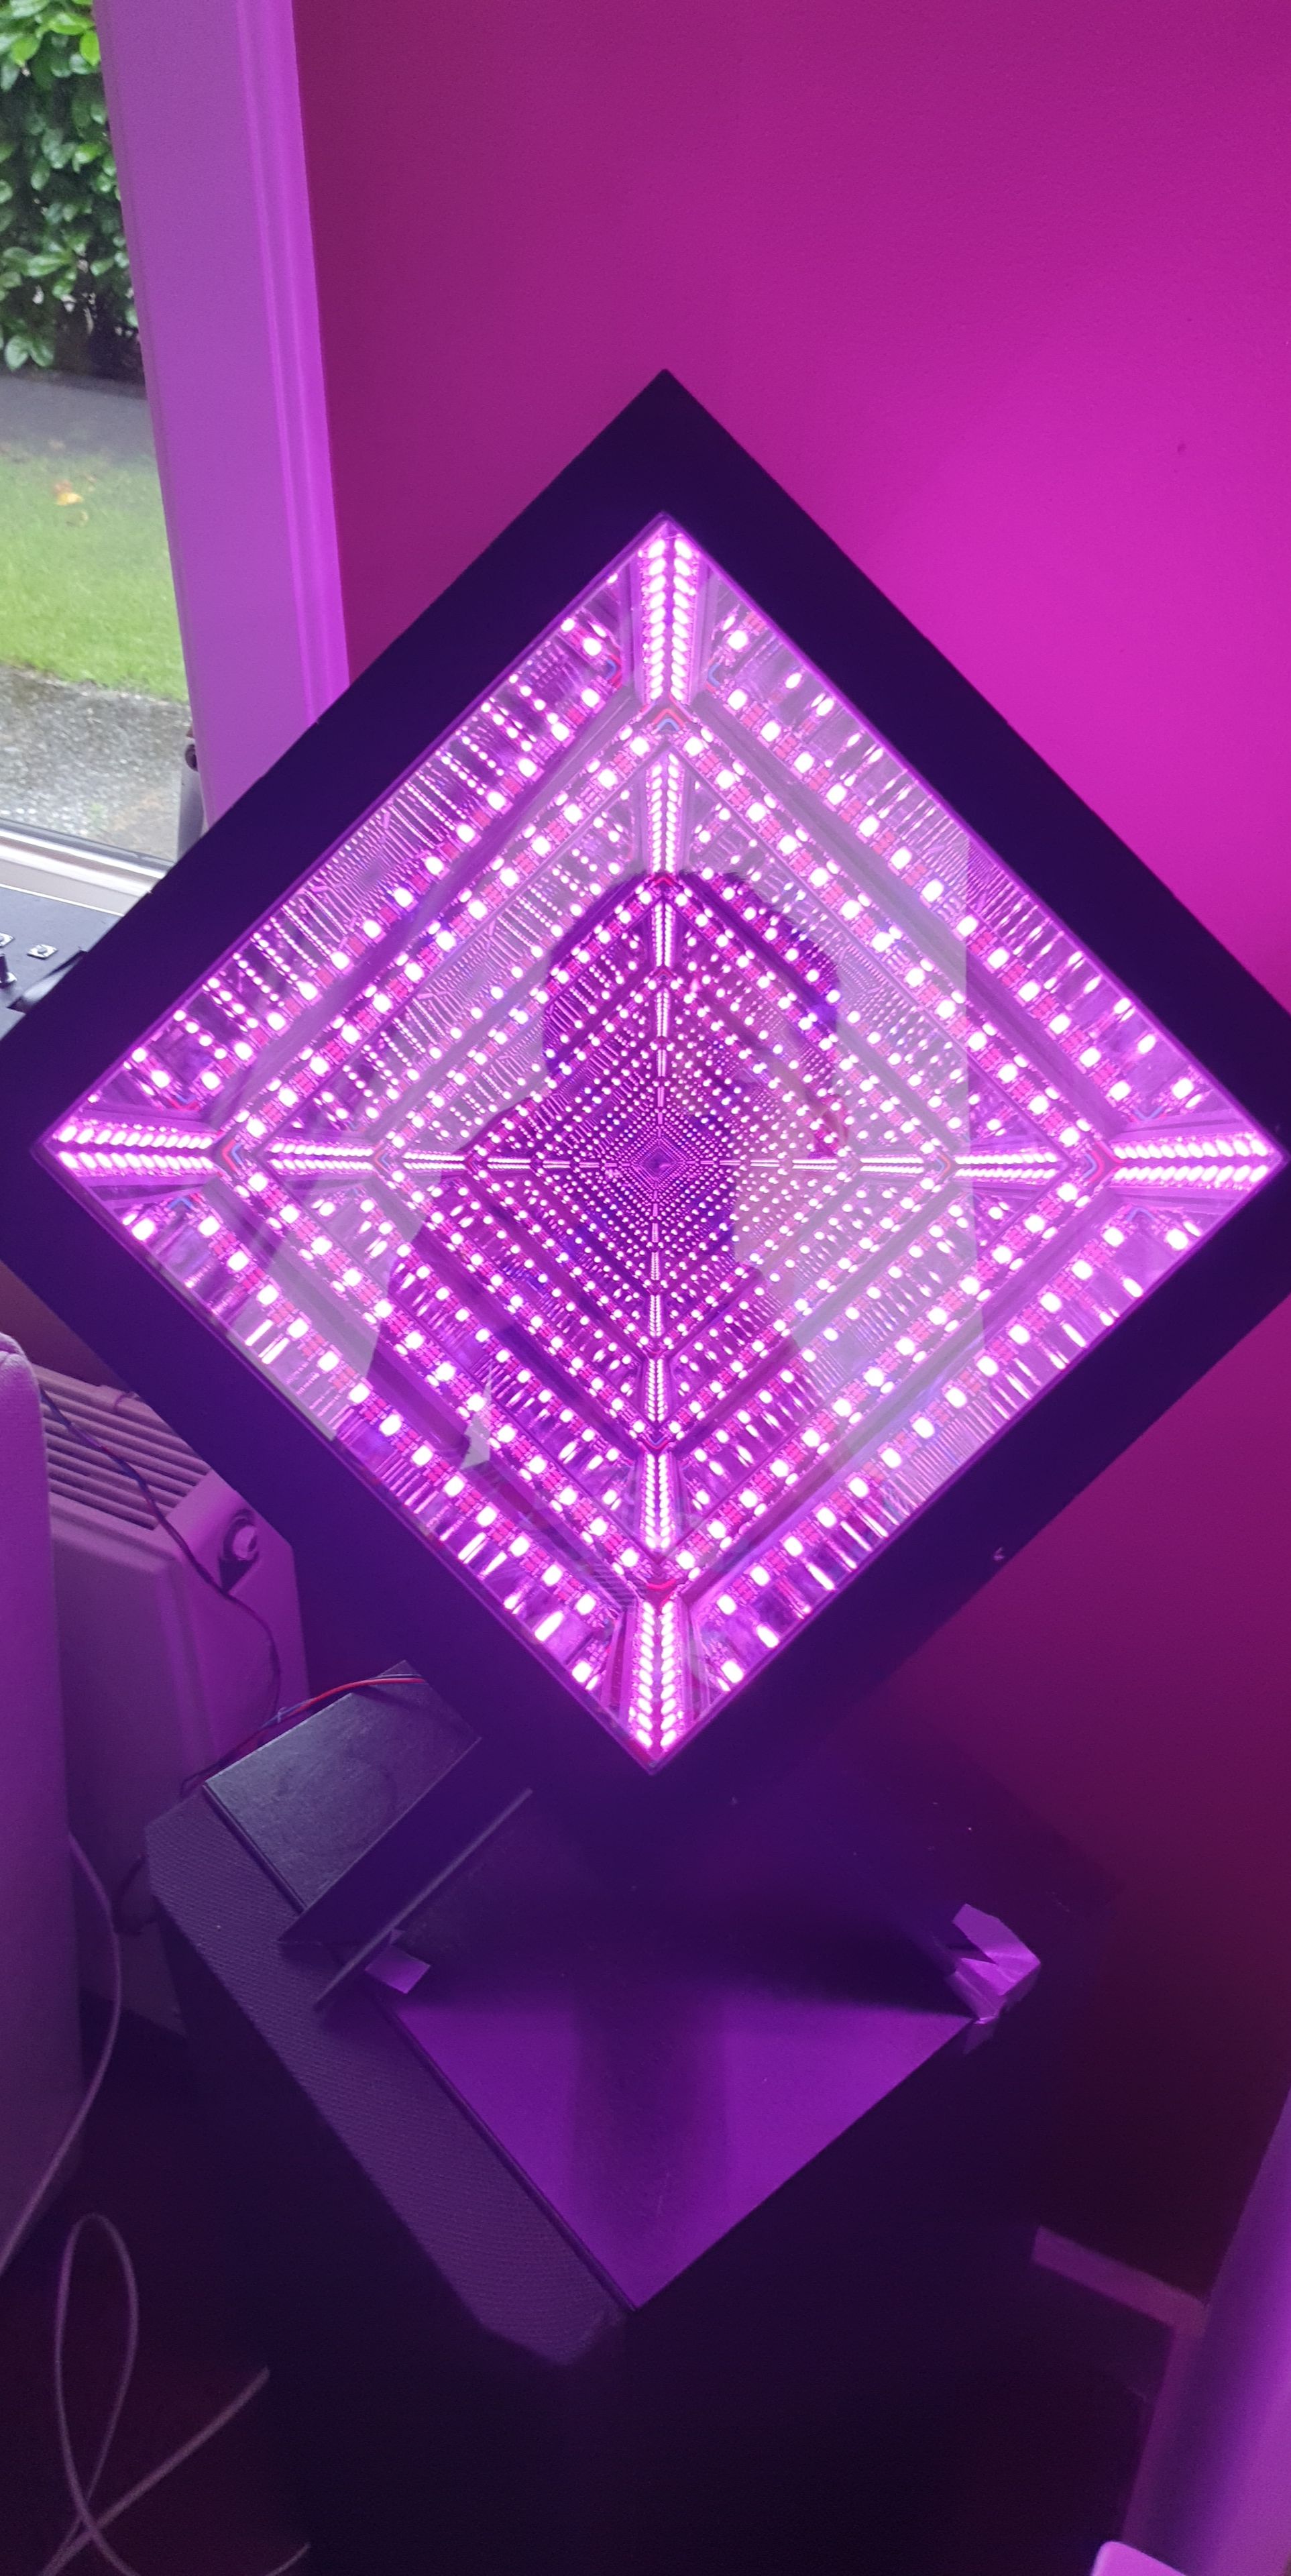
However, the primary characteristic of this cube isn’t it’s technical complexity, but rather how beautiful it is. Below are 8 more photos and videos because I simply could not choose. The hypercube is absolutely hypnotizing. It was a joy working on this project, especially during the Covid lockdown. The hypercube is still prominently placed in my parent’s living room.

Tinkering Projects - Hypercube showcase

Since I used a bunch of materials and equipment for this project that not everybody may have access to, I did not think it necessary to the files and code required to make this yourself. However, if you’re interested in doing so, feel free to contact me.


Bird & Squirrel Feeder


One of my characteristics that has remained somewhat underrepresented on this website so far is my love for animals. But inevitably I was going to make a project involving animals. Before this one, I was planning to make a remote control for my brother’s dog, so that we could steer her using a sausage on a stick which we could turn left or right with a remote (Click here to see my inspiration for that project), but I shelved that project after the radio modules I ordered didn’t work.

So, for the last few years I’ve been feeding the birds, squirrels, and ducks on a regular basis. My main goal was to have these animals come over more regularly.

I try to feed them by hand as much as possible so that they can get used to me as well, but I also want them to know that my house is a steady source of food, even in my absence. So I needed a way to automatically dispense food on a daily basis. Of course I could just buy an automatic feeder, but where is the fun in that?

Instead, I made my own. However, there were a few requirements to this design that made it a bit more challenging. Firstly, it had to be waterproof so that the food stored inside wouldn’t get moldy and the hardware won’t short-circuit. It also has to be sturdy enough to withstand any potential drunk, curious students. Lastly, animals (but squirrels especially) are very smart, and the dispenser should be able to resist their attempts at getting into the reservoir, but also not harm the animals as they try to do so.

The dispenser is designed as follows; the food is stored in the top. This reservoir is reinforced to withstand impact and the lid on top can slide in and is held in place using a padlock. The lid hangs over the edges of the reservoir to prevent water from leaking inside. Inside the reservoir is a funnel-like structure that guides the food to a single point.

Below this reservoir is the rotating part, which is essentially a cylinder with a hole cut out. It uses a similar ball bearing system as the BoozeBuddy and is powered by a strong servo motor. If it rotates itself underneath the reservoir, the hole cut out in the cylinder is filled with food, and if it then rotates 90 degrees, a hole in the bottom of the frame will let the food fall through.

After this, the food will fall down on a slide that drops it onto a small lasercut picknick table. The slide also serves to close off the hole in the frame of the cylinder above, so any animal that tries to reach inside won’t get their arm stuck when the cylinder rotates.

This dispenses about a small handful of food at a time. I’ve programmed it such that this happens once a day, but this could of course be adjusted to whatever I want.

Altogether, this was a surprisingly complex project for the simple problem I was trying to solve. But I did enjoy it a lot and I know the animals in my little yard are grateful, which makes it all worth it.